The World According to Arlene

Thursday, May 31, 2018

Ask Arlene about transplanting and dividing Perennials ©


Ask Arlene about transplanting and dividing Perennials ©

By Arlene Wright-Correll

A recent email question asked, “How do I deal with transplanting and dividing Perennials?”


For those of us who plant perennials we need to know that eventually we will have to divide them and the best time to divide them is in the early spring or fall.

Spring is the ideal time to transplant fall-blooming perennials and ornamental grasses and I find that fall, just about 6 weeks before a real hard frost is the best time to divide and transplant the spring blooming perennials.


Clumping perennials such as daylilies, chrysanthemums, asters, hostas, are plants typically grow from one main crown. The crown gets larger and larger each year, and sometimes you’ll see offsets (baby plants) attached to it. These plants are easiest to divide if you dig them up completely, so you can separate and divide the crown.

Taproot perennials such as oriental poppies, balloon flowers and butterfly weed just have one main, deep root. To divide them, you must dig up the plant and cut it so that each division has a piece of the taproot along with some growth buds.


Woody perennials like lavender, rosemary, candytuft, and euonymus have just one main stem or trunk, but they often spread when a stem touches the ground and takes root. You can sever and dig up the new plant without disturbing the original plant.

Spreading perennials like bee balm, phlox, leadwort, perennial vinca, and gooseneck loosestrife grow by surface or underground roots, or by dropping seed. They look more like a grouping of individual plants, each with its own crown and root system. You can divide these plants simply by digging up the ones you want to move while leaving the rest alone.

Once you have correctly divided your plants you are ready to replant your perennials. After the trauma of digging and ripping apart your beloved plant, you can see how important it is to baby them in their new home.  Dig a hole as deep as, and a little wider than, the root ball then mix in plenty of organic matter and sprinkle a source of phosphorus, such as bone meal or 0-19-0 fertilizer, in the hole to promote root growth.


Now place the division in the planting hole. Make sure the roots are spread out and down making sure the roots are down because you don’t want downward-growing roots to be turned upward in the hole or sticking up out of the ground.

Fill in around the plant with soil, tamping it gently down making sure the new plant is planted at the same depth as it was originally.

Water the plant well, and feed regularly with a balanced organic fertilizer. You must water about every other day for the first 2-3 weeks. You may want to water with a little extra water for the rest of the growing season, particularly if they’re planted in a spot that doesn’t receive regular water.  Add mulch around the plants to insulate the roots and hold in moisture.

Remember you can get many different kinds of seeds at our store by clicking Home Farm Herbery now.

May the Creative Force be with you as you tread the earth lightly!

Arlene Wright-Correll


Labels: , , ,

Tuesday, May 29, 2018

Ask Arlene about fall plantings and elderberries©


Ask Arlene about fall plantings and elderberries©

By Arlene Wright-Correll

A recent email question asked, “What are good seeds to plant in the fall?”

Fall planting is very good because eighty percent of a plant’s root growth occurs in late summer and fall, so plants establish better. We used to have milder temperatures and more dependable rainfall help plants acclimate in the fall and the fall soil is warmer and more conditioned than spring soil, making root growth easier.  The seasons are changing.  However, I also find pests and diseases that might otherwise attack young, vulnerable plants are not as active or numerous in the fall and less water is required to establish fall plantings as plants begin to go dormant for the winter. Plants put into the ground in the fall bloom more profusely the following spring.  Plants with an established root system can better withstand heat and wind the following summer.  It is the best time of the year to plant trees instead of spring when they are offered.  I also find it the best time of the year to find tree bargains.  Aside it is the best time of the year to plant bulbs.

With all that in mind I will get back to the seeds. Oriental Poppies may be a good choice for fall planting in your area. Radishes are quick and easy for fall planting.  Beets are a cool-weather crop, direct-sown in fall or as soon as soil can be worked in spring. Before planting, make sure that the soil is as loose, rich, and well-drained as possible, so that the root can grow without stress. Turnip is suitable for spring, fall, and even winter crops in mild areas. It overwinters beautifully, and is perfect for New Year's Day. Garlic is a perfect fall crop.

Try Cornflower seeds which are a good perennial. Wild Flowers will grace your garden next spring and for years to come if you cut them down 6 to 8 inches above ground the next fall and there after.  Try Green Wizard Rudbeckia. How about spearmint, lavender, oregano, pampas grass, creeping thyme, sweet William, lambs ear, chamomile just to mention a few.  Try catnip.

You can obtain most all of these seeds at Home Farm Herbery with Free shipping & a free gift.


Another question asks, “I hear elderberries are good for flu or colds.  So you have a good recipe?”


Elderberry tonic recipe.

Ingredients:

2/3 cup Elderberries (fresh or frozen),


3-1/2 cups of water,
2 tbsp fresh or dried ginger root (or powder), 

1 tsp cinnamon powder,
1/2 tsp cloves or clove powder 

1 cup raw honey. 

Instructions: 

Pour water into a medium saucepan and add elderberries, ginger, cinnamon and cloves.

Bring to a boil and reduce to a simmer until the liquid reduces to almost half (about 45 minutes to 1 hour). 

Remove from heat and let cool for 15 minutes.

Pour through a strainer into a glass jar or bowl.

Discard the elderberries (feed to chickens or compost) and let the liquid cool to lukewarm. 

Add 1 cup of honey and stir well. (Note: honey is added after the mixture has cooled to keep raw enzymes intact). 

Pour mixture into glass jars to be stored in the fridge for up to three months. 

Recommended doses: Prevention (can be taken daily). 

Kids (13 months-12 years old): 1/2 to 1 teaspoon. 

Adults: 1/2 to 1 Tablespoon. 

NOTE: If you are really sick or if your child is really sick I recommend you seeing your doctor. 

May the Creative Force be with you as you tread the earth lightly!

Arlene Wright-Correll


Labels: , , ,

Monday, May 28, 2018

Ask Arlene about Cucamelons and droughts ©


Ask Arlene about Cucamelons and droughts ©

By Arlene Wright-Correll

A recent email question asked, “What are Cucamelons?”

Cucamelons (Melothria scabra) are also called Mexican sour gherkins or mouse melons. They are close relatives of cucumbers and other cucurbits and are native to Mexico and Central America and have been grown for centuries.  Here in the U.S. we've only just "discovered" them. They are probably the cutest little things I've ever grown. They are rare.


Like their cucumber cousins, cucamelons are monoecious, meaning male and female flowers are borne separately on each plant. The male flowers provide the pollen while the female flowers will go on to produce the fruit.   The flowers are very tiny being a 1/6 inch tiny and the little, iridescent native bees love them! Even if you don't harvest the fruit, they make a great pollinator plant. 

Don't let the plants ramble; instead, grow them up a trellis or fence of some sort. If they're left to spread out over the ground, harvesting them will be a major pain. There are so many fruits; you'd be bending over for hours just to harvest them all.

The seeds are extremely small, but they hold a lot of potential. Don't plant the entire seed packet, unless you plan to eat a lot of cucamelons! Start with a dozen seeds at most. You can always grow more the following year. 

Each fruit is about the size of a grape, but the texture is far crunchier than you'd expect. They make delicious little dill pickles just by using one of those pre-packaged dill pickle spice blends you can get at the grocery store. The seeds are carried by Home Farm Herbery.  

Another email question asks, “How Do You Garden in a Drought?”

The seasons are changing.  Here I have notice for the past 2 years that February really doesn’t end until April and September is like July.  Thus we act accordingly.  At Home Farm Herbery we tend to use raised beds, straw bale gardening.  You can grow a lot in a 4 ft x 4 ft or 4 x 8 ft raised bed and it doesn’t take a lot of watering.


If your property is not large enough to have holding ponds then seriously consider rain barrels to catch all that early spring rain.  Everyone has their garden favorites, but open your mind and your palate to varieties more suited to your climate and changing weather patterns. When buying seeds, look at the plant descriptions and choose varieties that are heat tolerant. Most squashes, pumpkins, melons and beans do very well in the heat, though they still need irrigated.  There are so many things that we have no control over, and the best we can do is to adapt to the changing conditions

May the Creative Force be with you as you tread the earth lightly!

Arlene Wright-Correll


Labels: , , , ,

Sunday, May 27, 2018

Ask Arlene about tea and tea recipes©


Ask Arlene about tea and tea recipes©

By Arlene Wright-Correll

The other day I was asked if I knew some good herb tea recipes.  Here are three of my favorite recipes.


Calendula Tea.  Calendula is beautiful, delicate and lightly aromatic. You can use it as a tea for its ability to move the lymph system, its ability to relax the gastrointestinal tract by reducing inflammation and getting bile and other digestive juices moving, and its whole-body detoxifying properties. You can drink a couple of cups a day and really enjoy it in the late morning and early afternoon.  Bring 6 ounces of water to a boil and steep 2 teaspoons of dried calendula flowers for 10 to 15 minutes. Remove teabag. Sweeten with honey, if desired. Calendula also supports healthy skin and makes a fantastic compress to use on acne and cold sores. After making it into a tea, I save the teabag and use it on my face at night before going to bed.  It is an antiseptic, antiviral, antispasmodic, anti-inflammatory, astringent, bitter tonic, detoxifier, diuretic, and diaphoretic, estrogenic.

Chamomile Tea.  Chamomile is a favorite tea as it’s tremendously soothing for the whole body. You can use it for gallbladder support, nausea relief and its antispasmodic and anti-inflammatory properties.  Bring 6 ounces of water to a boil and steep 1 teaspoon of dried chamomile flowers for 10 minutes. Remove tea by straining. Sweeten with honey, if desired.  Chamomile has sedative properties, which make it a fantastic sleep aid. Use it to assist with relieving anxiety and settling the body. If you have trouble sleeping then a strong cup right before bed to help settle your body and relieve nausea that tends to pop up in the evenings.  It is antibacterial, anti-inflammatory, antiseptic, antispasmodic, bitters, prevents vomiting, sedative.

Spearmint Tea
It’s both invigorating and soothing at the same time. It is often used for acid reflux, expelling gas and nausea relief.  Bring 6 ounces of water to a boil and steep 1 teaspoon of dried spearmint leaves for three to five minutes. Remove tea or strain.  Sweeten with honey, if desired.  Spearmint  is a lovely herb to use in a blend. It is also used alongside chamomile. Although the herb contains menthol, it doesn’t have nearly as much as peppermint. This is why it can relieve acid reflux rather than exacerbating it, as peppermint has been known to do.  It is an antibacterial, anti-inflammatory, decongestant, digestive, stimulant, stomachic, tonic.

You can buy these herbs and even pre-made herbal teas and tisanes on Home Farm Herbery’s site and even get free shipping.  Check out our online store today.  

May the Creative Force be with you as you tread the earth lightly!

Arlene Wright-Correll


Labels: , , , , , ,

Friday, May 25, 2018

Ask Arlene about digestive herbs and more©


Ask Arlene about digestive herbs and more©

By Arlene Wright-Correll

I was recently asked, “Can you tell me about digestive herbs?”


Most culinary herbs help digestion, but a few are outstanding such as mint (Mentha spp.). Spearmints, peppermints  and other mints are all respected for their digestive benefits.


In the early Christian church, peppermint was so valued it was accepted as payment of tithes. Well-studied for its digestive effects, peppermint contains several carminatives such as menthol; anethole and carvone that help settle the stomach and relieve gas. Peppermint is also a gentle “bitter herb.” Bitter herbs are those that aid digestion by stimulating bile production. 

Caraway (Carum carvi)  and these seeds contain carvone and other compounds that relax the smooth muscles of the digestive tract. Seed extracts used in certain commercial herbal digestive aids (sometimes along with peppermint oil) have been found to improve chronic indigestion. Enjoy a small dish of caraway seeds with cheese, or sprinkle them into soups or stews.


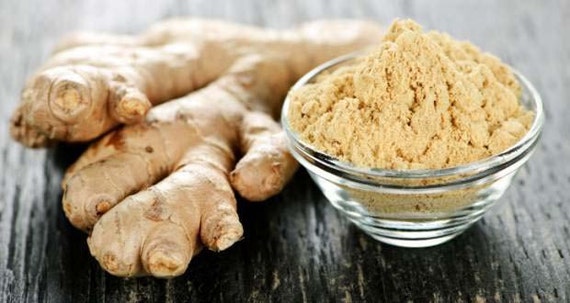
Ginger (Zingiber officinale).  The gingerols and shogaols in ginger are antispasmodics, soothing the stomach and stimulating peristalsis. Ginger encourages gastric emptying. It also relieves constipation, and may ease symptoms of irritable bowel syndrome. Gingerols degrade with cooking, processing and storage, so enjoy it fresh or minimally cooked. 


Another question asked is “How can I judge art?”


There are many ways and here are a few of them. I look for beauty, skill, inherent meaning, uniqueness, and fulfilled intent.  Beauty is really in the “eye of the beholder”. 

One may as if the repeating shapes, patterns, and symmetry or if colors, especially colors that complement or enhance each other.  Are the textures, both visual and physical (like thick, impasto paint) and in crops and compositions that focus the eye and keep the viewers’ attention.  Is the movement or flow guiding the viewers through the art?  Are there correct or appealing proportions of figures and objects and lastly is the presentation and framing. Correct.

Recently I was asked a very good question.  “As an artist is a blog really worth my time?” 


My answer is yes. Today the internet is a highway and a blog is like a billboard on the biggest highway in the world.  When you start a blog, it’s like putting up a billboard next to the biggest highway in the world.

At first, your blog/billboard is small and people can barely see it as they drive by, and only if they’re really looking for it, but every time you add another blog post to your blog.  Your billboard gets a little bigger! Each new post is like adding an extra square foot of signage to your board.  If you add a new blog post every day (or every other day) people won’t have to look quite so hard to see your billboard. In fact, after about a half year of blogging, you’d probably be getting some decent attention!

 May the Creative Force be with you as you tread the earth lightly!
 
Arlene Wright-Correll


Labels: , , , , , , ,

Wednesday, May 23, 2018

Ask Arlene How to turn grapes into raisins & other stuff©


Ask Arlene How to turn grapes into raisins & other stuff©

By Arlene Wright-Correll

A question asked of me this week, “How can I turn my grapes into raisins?”

Here is my Home Farm Herbery Homemade Raisins Recipe


Blanch grapes by dropping by the bunch in boiling water for 30 seconds, then transferring into a bowl of ice water.  Remove stems.  Pat dry with a towel and spread in a single layer onto baking sheets.  Place baking sheet in an oven set to warm (180 degrees is ideal) and allow to dry 18-24 hours, turning after 12 hours to prevent sticking.  Once dark and wrinkled, remove from oven and allow to cool before storing in an airtight container. 


Note: should you not have grapes and want KY grown natural raisins that are made at Home Farm Herbery then we have JumboThompson Seedless Raisins. 

An email question asks, “Do you know how to make Wild Greens Soup?


Yes and here is a good recipe. 

Ingredients:

1 medium onion, finely chopped
1 clove garlic, chopped
1 tablespoon vegetable oil
2 teaspoons curry powder 

2 cups chopped potatoes
4 cups chopped tender wild greens
4 cups water
1/2 teaspoon salt
1/2 teaspoon freshly ground black pepper
Tamari sauce to taste

Directions:

Sauté the onion and garlic in the oil, stirring constantly, until the onion is translucent. Stir in the curry powder and sauté a minute longer. Stir in the potatoes and greens. Sauté briefly! Add the water and simmer, covered, for 15 minutes or until the potatoes are tender. Puree, then reheat and season with salt, pepper, and tamari.

Another email question asks, “I heard one can make sorbet out of lilac flowers. Is that true?”

Yes and here is a great recipe for lilac sorbet by Cathy Wilkinson Barash, who says she adapted it from her dianthus sorbet recipe in her book Edible Flowers: From Garden to Palate (Fulcrum Press, 1995).

 2 cups water,   ¼ cup sugar, ½ cup lilac florets, stems removed and coarsely chopped (the stronger scented, the better).

Pour water into an enamel or stainless steel saucepan. Add sugar and florets, stirring well to dissolve sugar.  Next bring liquid to a boil, turn down heat and simmer for 5 minutes. Remove from heat and let cool to room temperature. Now pour into an ice cream maker and process according to manufacturer’s directions. If not serving immediately, scoop sorbet onto waxed paper in serving-sized portions, on a cookie sheet and freeze. Once frozen, put in a freezer bag.

Serving suggestion: Put a sweet-flavored daylily flower (pistils and stamens removed) in a wineglass, and then add a scoop of the sorbet. Top with candied lilac blossoms.

*Dark-colored flowers produce an interesting color sorbet; light-colored flowers produce an almost translucent white sorbet.

May the Creative Force be with you as you tread the earth lightly!

Arlene Wright-Correll


Labels: , , , , , ,

Monday, May 21, 2018

Ask Arlene about Chia Seeds©


Ask Arlene about Chia Seeds©

By Arlene Wright-Correll

I have finally decided to change the “Art only Spoken Here©” column to “Ask Arlene©” since I seem to get 90% more questions about everything else except art.  However, when we get an art question that I have not written about over the past years, I will gladly answer it.  In the meantime, here is a new question.

A recent email question asks, “Are Chia seeds edible and are these what are used on Chia pets. Are they easy to grow?”


Yes, they are and yes they are edible. Chia seeds, originally used by the ancient Aztec culture as a food source, are prized for being high in omega-3 fatty acids and other nutrients. Our Home Farm Herbery Organic Chia seeds (Salvia hispanica) are extremely high in Omega-3 and are loaded with antioxidants, vitamins, minerals, and fiber. Organic chia seeds can be eaten raw as a dietary fiber and omega-3 supplement. The soaked seeds are gelatinous in texture and are used in gruels, porridges and puddings. Ground chia seed is used in baked goods including breads, cakes and biscuits.

Chia Seeds help weight loss. Chia seeds are popular for weight loss since they reduce food cravings by preventing some of the food that you eat from getting absorbed into your system. This blockage of calorie absorption makes them a great diet helper and you feel fuller faster: They can also help your diet by making you feel full. This is because they absorb 10 times their weight in water, forming a bulky gel. These are also great for athletes because the "chia gel" can hydrate the body.  Plus there is evidence to suggest they can reduce blood pressure.  Omega-3: They are the richest plant source of Omega-3 (the vital fats that protect against inflammation—such as arthritis—and heart disease). In fact, they contain more Omega-3 than salmon!

Lots of benefits for diabetics because chia seeds slow down how fast our bodies convert carbohydrates into simple sugars, studies indicate they can control blood sugar. This leads scientists to believe chia seeds may have great benefits for diabetics.  They are easier to digest than flax seeds, and don't need to be ground up.

They can be eaten raw as they have a nice "nutty" flavor or they can be soaked in fruit juice as they do in Mexico where they call this "chia fresca". They're perfect in porridges and puddings and they make an ideal addition to baked goods including breads, cakes and biscuits. We recommend two daily doses of about 20 g each (1.5 ounces total).

Chia seeds are tiny. You don't need to dig a hole to bury them. Lightly ruffle your weed-free garden area with a rake or, if you only have a few seeds and are spacing them carefully, loosen the earth with your fingers. Sprinkle a few seeds over the soil, and rub gently to cover them.  Water the seeds daily, and within about a week you can expect to see chia sprouts taking form.  When planting chia seeds directly into the garden, I create a carpet of chia and then thin the plants as they grow. Some are fed to the hens, some are used as mulch, and some are harvested while young to dry the leaves for chia tea.

Chia seeds germinate successfully in pots. If you want to start your chia plants indoors or close to your garden tap, sprinkle them lightly in your pot and water regularly. When they are about three inches tall, they are ready for transplanting.

Remember to mulch your chia plants and water them regularly. They thrive in an organic garden and don't like competing with weeds.  Chia plants grow as tall as an adult.  In addition to the health benefits associated with eating chia seeds and drinking chia leaf tea, chia flowers look lovely in the garden since they have a lovely purple/lavender colored flower. 

Note: If you wait until the flower head browns, you risk losing seed. Begin harvesting your chia as soon as most of the petals have fallen. Give them time to dry in paper bags or on a drying rack, but prepare for at least some of the chia seeds to break free in the process. Do not hang the plants upside down in your shed.

Tread the earth lightly and in the meantime may the Creative Force be with you.

Arlene Wright-Correll

Home Farm Herbery LLC.


Labels: , ,

Sunday, May 20, 2018

Tomato Powders are Very Versatile©


Tomato Powders are Very Versatile©

By Arlene Wright-Correll

 First off let me remind those of you who are health conscious that you can buy salt free tomato powder and you can buy sugar free tomato powder. These are also gluten free and are great for vegans. 


Both these naturally antioxidant rich tomato powders boast high levels of vitamins A, C, and K, making it a perfect choice for a healthier you! Non-GMO! Getting your veggies has never been so easy... and delicious! Once opened, tomato powder is hypersensitive to moisture, so store it in your refrigerator to enjoy the fresh tomato taste for years!

We create and process both at Home Farm Herbery and we can tell you that they are both great tasting and have a wonderful aroma to say nothing of rich and strong tomato flavor.  We use it in tomato sauces, to make tomato paste and on our pizzas and in our pasta. We put them in soups, or make our own tomato soup and even make our own tomato juices.  

We like the fact that they take up much less room than canned products and if you are canning yourself you will discover all that hard, hot work is done and as we have said these powders are good for years.  Just add up the cost of breakable canning jars, replaceable lids, hours of labor and possible contamination as opposed to the cost of tomato powder.

Once you decide whether you want sugar free or salt free or even if you don’t care the decisions is easy.

Here is how to make some things with tomato powder.


*Note: This recipe for 8-oz. of tomato sauce works great if you already have a recipe that you use tomato sauce in that you love!

INGREDIENTS:

¼ Cup + 2 Tbsp. Tomato Powder
1/8 tsp. salt
         

¾ Cup + 2 Tbsp. water

DIRECTIONS:

Heat the water until almost boiling. In a small bowl combine the tomato powder, salt, onion powder and garlic powder. Pour hot water over powder mixture and stir until thoroughly dissolved. Use in place of an 8-oz. can of tomato sauce in any recipe.


Making tomato juice using tomato powder is really easy. We simply stir 2 tablespoons tomato powder into 8 ounces of cold water for a refreshing tomato juice without all the nasty sodium and preservatives of the store-bought stuff.  It is a lot cheaper and less land fill waste than store-bought stuff also.


At Home Farm Herbery we make this Pizza sauce simply by combining 1/2 cup tomato powder and 1 1/2 cups water in a saucepan. Bring to a boil, reduce heat and stir in 1/2 teaspoon each of garlic powder and a pinch of salt. Add 1 tsp. of sugar or a few drops of stevia to counter the acidity, and simmer until the sauce is thick.  We always use a pinch of our stevia leaf   or stevia powder. 


When we want Tomato paste we only need a tablespoon or two of tomato paste, we don’t open a can.  We simply mix 2 parts tomato powder to 1 part water to make as much or as little tomato paste as we need.


We often make instant tomato soup by stirring 2 tablespoons of tomato powder into 8 ounces of boiling water. Add a pinch of onion and/or garlic powder, and salt and pepper to taste. It’s great any time of the year and especially without any chemicals or whatever things the big manufactures use. 

These products are a great way to stretch your food dollars especially in these times and speaking of these times we are finding our dollars spent for long lasting dehydrated or sun dried fruits and vegetables are better spent and sitting in our pantry than sitting in a bank.

May the Creative Force be with you!

Arlene Wright-Correll


Labels: , ,

Saturday, May 19, 2018

The Health Benefits of Red Beans and Rice©


The Health Benefits of Red Beans and Rice©

By Arlene Wright- Correll


Whenever one thinks of New Orleans one thinks of Red Beans and Rice and that is about it!

According to legend, the Cajun dish combining red beans and rice was served on washday because the dry beans could be simmered on the stove all day while attention was devoted to doing laundry.

Those days have changed because we now have canned beans and the nutritional benefits of this dish can be obtained quickly and easily any day of the week because  any kind of beans and rice are a great source of complete protein, minerals and dietary fiber.

But once you take red beans and rice, kidney beans (red beans) are combined with vegetables (onions, carrots, bell peppers, celery) and ham, bacon or smoked sausage it just gets better.

I don’t eat a lot of meat any more but when I make red beans and rice simmered in chicken broth and seasoned with cayenne pepper and garlic, the cooked bean mixture is served over white rice. Adding meat (if you are a meat eater) and vegetables contributes to the overall nutrition.

Also in my old age I have stream lined our original recipe by using canned kidney beans and eliminating the entire soaking etc. thus reducing many hours off this recipe and it is still good.

Here is Home Farm Herbery’s original favorite Red Beans and Rice recipe with meat.

Ingredients:

2 cups of dried kidney beans

3 tablespoons of vegetable oil

1/4 cup of Tasso (a highly spiced, cured and smoked pork shoulder) or chopped ham

1-1/2 cup chopped onion

3/4 cup of diced bell pepper

3/4 cup of chopped celery


1 lb of andouille sausage

4-1/2 cups of chicken stock

2 cups of cooked rice.

Directions:

Add the beans to a large bowl and cover with water by 2 inches.

Soak the beans for about 8 hours or overnight.

Drain and set aside.

In a large Dutch oven, heat the oil over medium-high heat.

Add the Tasso or chopped ham and cook, stirring (about 1 minute).

Add the onions, celery and bell peppers to the pot.

Season with about 2-3 tablespoons of Red Beans and Rice Seasoning and cook, stirring, until the vegetables are soft (about 4 minutes).

Add another 1-2 tablespoons of Red Beans and Rice Seasoning and the andouille sausage and cook, stirring to brown the sausage (about 4 minutes).

Add the beans and chicken stock, stir well and bring to a boil.

Reduce the heat to medium-low and simmer, uncovered, stirring occasionally, until the beans are tender and start to thicken (about 2 hours).

If the beans begin to dry out or become too thick, add more chicken stock, approximately 1/4 cup at a time.

Remove from the heat and with the back of a heavy spoon, mash about 1/4 of the beans against the side of the pot.

Continue to cook until the beans are tender and creamy (about another 15 to 20 minutes).

Spoon rice into bowls and top with bean mixture.

May the Creative Force be with you!

Arlene Wright-Correll


Labels: , , , , ,

Friday, May 18, 2018

Some Facts about Dehydrated Veggies and more©


Some Facts about Dehydrated Veggies and more©

By Arlene Wright-Correll

When we think about dehydrated veggies or even fruits we usually think conspiracy or survivalists, camping or way out places where you can’t get fresh. I will admit that fresh is better, but I think dehydrated is better than canned.


I have done lots of canning and it is a tedious, time consuming job to say nothing of hot!

It is easy to do dehydrating and it is not expensive.  Once you get started you can walk away from it while it does its thing.  In 1973 Carl made me a 12 shelf dehydrator and I was hooked.  Nowadays I have a commercial one.


Let me take a minute to tell you about just spinach because spinach is rich source of over twenty vitamins, antioxidants and nutrients that are retained in dehydrating instead of being diluted in canning.  Our Home Farm Herbery dried organic spinach flakes are just the thing to use when we make lasagna or just about anything else.  We use them in pasta and breads, soups, on pizza, chicken and salads.  For those cooks who make their own fresh pasta these flakes is just the thing to use when making spinach pasta.  Dried spinach flakes take up less room than cans in our pantry or in our freezer and they have a longer shelf life.   We love this about it but we love the flavor better.  It is a great way to have spinach all winter long.

When we want just plain spinach without adding it to any recipe just add 1 cup dried spinach flakes to 3/4 cup hot water. Let spinach soak for 1-3 minutes until tender. Drain water. Add 3 minutes soak time when re-hydrating in cold water.  Dehydrated food beats canning or canned foods.   It tastes better, still has lots of healthy elements in it, takes up less space and lasts 20 years. It is so easy and healthy.

We use dehydrated fruit without thinking about it such as raisins, prunes, apples, apricots, pineapple just to mention a few and never really think about them in our baking, snacks and more yet we rarely think of the vegetables.

Consider Carrots and you will find gently air dried and carefully selected vegetables; no additives or preservatives; Non-GMO in our carrots and dehydrated vegetables maintain their high nutritive value with less nutrients lost, plus you can store for 1-20 years in your cupboard; No more wasted food.  Dehydrated foods save time and money; 16 ounces of dried carrots yields 84 ounces when reconstituted. That is amazing!  You can easily do both these vegetables and much, much more.


There are no canning jars, lids, hot water and time consumption.  By using dehydrated foods we are putting health back into our families, saving valuable time, getting longer shelf life for foods, preparing for emergencies just to mention a few benefits.

If you don’t grow your own food like we do then seriously consider investing in a dehydrator or even stocking up on our Home Farm Herbery dehydrated fruits and vegetables now. 


You can even do meats like jerky or your own doggie treats 

and it will be healthier and cheaper.


At Home Farm Herbery we do dehydrated vegetables, fruits, mushrooms and jerky and you can find them by scrolling through our online store now.  

Why not try dehydrating for yourself?

May the Creative Force be with you!

Arlene Wright-Correll


Labels: , , , ,

Wednesday, May 16, 2018

Cooking with Sriracha©


Cooking with Sriracha©

By Arlene Wright-Correll

Sriracha is a type of hot sauce or chili sauce made from a paste of chili peppers, distilled vinegar, garlic, sugar, and salt. It is named after the coastal city of Si Racha, in Chonburi Province of eastern Thailand, where it may have been first produced for dishes served at local seafood restaurants

We produce this powder at Home Farm Herbery where we grow the chili peppers and garlic and Arlene has two of her favorite recipes where she uses a lot of what is produced here at the farm.

One is a cold recipe and one is a hot recipe and both are delicious and we want to share them with you hoping that you will add them to your cooking repertoire.

Quinoa Black Bean Salad with Sriracha Dressing


Ingredients:

1 cup quinoa  

2 cups vegetable stock

2 cups roughly chopped kale

1 teaspoon salt, for massaging

2 tablespoons extra-virgin olive oil

2 tablespoons freshly squeezed lemon juice

1 teaspoon Sriracha powder  

Fleur de sel, to taste  

Freshly crushed black pepper, to taste

1 medium sized red bell pepper, chopped

1 medium carrot, peeled and shredded

1 small shallot, thinly sliced

1 fifteen ounce can black beans, drained and rinsed

Directions

In a medium saucepan, over medium high heat, bring quinoa and vegetable stock to a boil. Turn heat down to low and simmer until all liquid has absorbed and quinoa is light and fluffy. Remove from heat and cool for ten minutes.

While quinoa is cooking, rinse kale and gently massage with teaspoon of salt to soften and make less bitter. Rinse and drain.

While quinoa is cooking, rinse kale and gently massage with teaspoon of salt to soften and make less bitter. Rinse and drain.

In a large salad bowl, combine quinoa, kale, chopped bell pepper, shredded carrot, sliced shallot and black beans. Gently toss with dressing and serve.


Teriyaki Chicken with Sriracha Garlic Sauce


Ingredients:


2 tbsp. Sriracha Powder 

1 tsp. Dried Shallots  

3 tbsp. Rice Vinegar

1 tsp.  brown sugar

2 tbsp peanut or sesame oil

2 cups white rice

2 ½ cups water

1 14 oz .can lite coconut milk

1 can red beans - no salt, drained and rinsed

1 tbsp. vegetable oil.

1 lb boneless, skinless, chicken breast cut into small pieces

4 carrots peeled and grated

1 yellow squash, diced

1 zucchini, diced

2 celery stalks, sliced

1 cup broccoli florets

3/4 cup + 1/4 cup (divided) low sodium teriyaki sauce

1 cup pineapple, cubed

Directions:

In a blender, combine first six ingredients (Granulated Garlic through the peanut or sesame oil).

Blend to a paste consistency, scraping the sides of the blender if needed.

Let the sauce stand for at least 2 hours to allow flavors and heat to develop.

In a large saucepan over high heat, combine water and coconut milk.

When the liquid starts to boil, stir in the rice.

When rice starts to boil again, reduce heat to low, cover and simmer 20 minutes.

Remove rice from heat, fluff with a fork, and stir in beans.

Heat the vegetable oil in a large skillet over medium high heat.

Add chicken and cook until pieces are crispy and brown and cooked through.

Remove chicken with a slotted spoon to a separate dish and keep warm.

In the same skillet add the carrots, squash, zucchini, celery and broccoli and cook until slightly tender but still crisp.

Return the chicken to the skillet and add 3/4 cup teriyaki sauce and 2-3 teaspoons of the chili garlic paste, toss to combine.

Add the pineapple and serve over rice.

Mix the remaining chili garlic paste with 1/4 cup teriyaki sauce and use to drizzle over the top of the dish when serving.

May the Creative Force be with you.

Arlene Wright-Correll


Labels: , , , , ,

Tuesday, May 15, 2018

Spatchcock Chicken with Za’atar©


Spatchcock Chicken with Za’atar©

By Arlene Wright-Correll


Here is another great recipe using Za’atar.  At Home Farm Herbery we just love this delicious seasoning and it is great on chicken.

Spatchcock basically means to butterfly the chicken so that it lays flat and cooks more evenly over indirect heat on the grill.

When we choose our chicken, we use either a roasting or frying chicken. They are both young chickens and can weigh anywhere from 2-5 pounds. If you get a larger or smaller bird, you may have to adjust the cooking time accordingly.

When using the grill, cooking times may vary depending on how hot your grill gets.  If we use the grill in the winter we get a different cooking temperature than in the summer. It's tempting to lift the lid often to check on the food, but try not to lift it too often, it reduces the temperature of the grill each time you do. Just make sure your bird is not over the flame or hottest part of the grill or you may end up with a burned bird. Always use a thermometer to check the internal temperature to determine doneness.

Ingredients:

1 medium sized roasting or frying chicken about 3Lbs

2 red onions, thinly sliced

2 teaspoons Garlic Powder 

4 Tablespoons Olive Oil

1 1/2 teaspoon Ground Allspice  

1 teaspoon Ground Cinnamon

1 Tablespoon Sumac sumac 

1 lemon, thinly sliced

1 cup chicken stock or water (We have no problem using canned or packaged chicken stock)

1 teaspoon Sea Salt  

1 teaspoon Fresh Ground Black Pepper

2 Tablespoons Za'atar  


Directions:

Prepare the chicken by removing the backbone and laying the whole chicken out flat.

Put the chicken in a large zip bag or container that will allow chicken to be completely covered with marinade.

In a large bowl, onions, Granulated Garlic, olive oil, Ground Allspice, Cinnamon, lemons, chicken stock or water, salt and pepper.

Pour the spice mixture into the bag or container and fully submerge the chicken in the marinade.

Place chicken in the refrigerator for a few hours or overnight.

When you are ready to prepare the chicken, preheat the grill. If it is a gas grill, turn off one side of the burner or if charcoal, move the hot coals to one side of the grill to create indirect heat cooking.

Remove the chicken from the marinade pat dry with a paper towel and sprinkle the chicken on both sides with the Za'atar. Discard the marinade.

Lightly oil the grill grate and place breast side up on the coolest part of the grill.

Close the grill lid and let chicken cook about 30-40 minutes before turning over and cooking until the internal temperature is at least 155-160 degrees. Remove from heat and let chicken rest about 10 minutes until the internal chicken temperature is 165 degrees.

Serves: 6

May the Creative Force be with you!

Arlene Wright-Correll


Labels: , , , , , , ,